

Bedroom Floor Plan Guide: Smart Layout Ideas for a More Beautiful Space
Table of Contents
Introduction
Every bedroom floor plan starts with a rectangle and three questions. Where does the door swing? Where does the window sit? Where does the bed go?
Architects answer those questions on paper before anyone buys furniture or moves a wall. You can do the same with a tape measure, a pencil, and a pad of graph paper. The method takes about an hour and prevents the most expensive mistakes in a room: a bed that blocks a door, a window that ends up behind a wardrobe, a headboard on a wall full of outlets and vents.
This guide focuses on full-size rooms, from guest bedrooms to primary suites. It gives you the standard bedroom dimensions used in US homes, a four-step method to make your own bedroom layout, four proven plans for a master bedroom floor plan, and the errors that most often undo a good layout.
Working with an 8×10 or 10×10 room? Read our small bedroom layout guide first. It covers the tighter clearances that smaller rooms demand. For styling once your plan is set, our collection of bedroom ideas picks up where this guide ends.
1. Standard US Bedroom Dimensions (From Guest Rooms to Primary Suites)
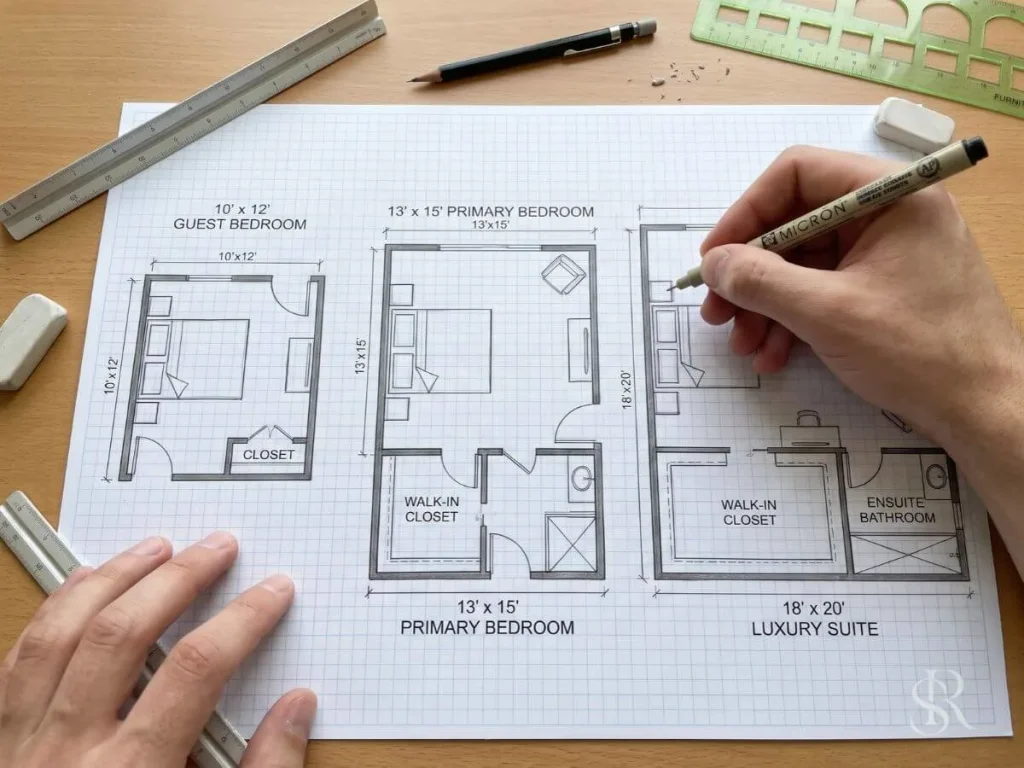
Standard bedroom dimensions fall into three tiers. Knowing yours tells you which furniture and layout to plan for.
A note on code. The model residential code in the US (the International Residential Code) sets a minimum of 70 square feet for most habitable rooms, with no horizontal dimension under 7 feet and a ceiling at least 7 feet high. Bedrooms also need an egress window or door. Local rules vary, so confirm with your building department.
| Tier | Typical size | Area | Typical bed |
|---|---|---|---|
| Secondary and guest | 10 x 10 to 11 x 12 ft | 100 to 132 sq ft | Full or queen |
| Standard primary | 12 x 14 to 14 x 16 ft | 168 to 224 sq ft | Queen or king |
| Luxury primary suite | 16 x 20 ft and up | 320+ sq ft | King or California king |
Secondary & Guest Bedrooms (10×10 to 11×12 Feet)
These rooms hold a queen bed, two nightstands, and one dresser. A 10×10 room leaves 30 inches on each side of a centered queen, and 40 inches at the foot. An 11×12 adds a bench or a desk.
Plan for one clear job: sleeping. Do not add a sofa. Rooms at the lower end of this range follow the tighter rules in our small bedroom layout guide.
Standard Primary Bedrooms (12×14 to 14×16 Feet)
This is the most common
in new US homes. A king bed (76 x 80 inches) sits comfortably in a 12×14 room with 34 inches on each side. At 14×16, you gain space for a bench, a reading chair, or a 60-inch dresser without crowding the walkway.
The room usually has one door, one or two windows, and a reach-in or walk-in closet nearby.
Luxury Primary Suites (16×20+ Feet)
At 320 square feet or more, the bedroom stops being one room. It becomes zones: sleeping, sitting, and often dressing. A king bed takes up about 42 square feet of that floor, roughly 13 percent. The challenge changes from squeezing furniture in to keeping the room from feeling empty or scattered.
2. How to Make Your Own Bedroom Layout (Step-by-Step Guide)
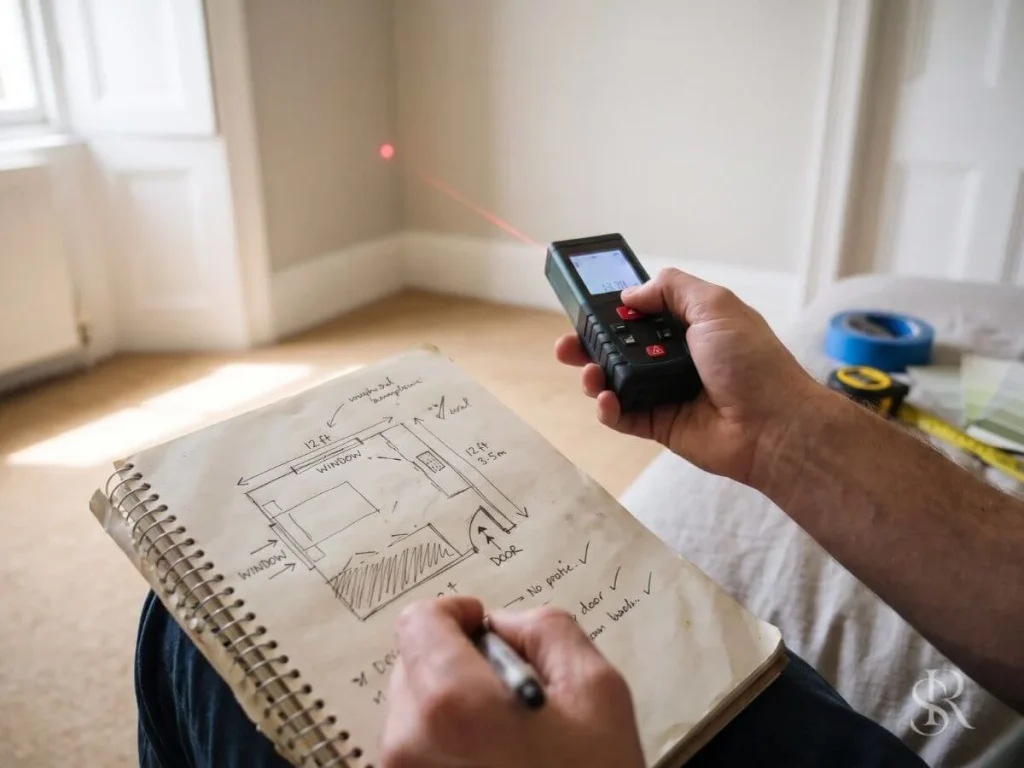
This is how to make your own bedroom layout the way a designer would. You need a tape measure or laser measure, a pencil, an eraser, 1/4-inch graph paper, a ruler, and tracing paper.
Step 1: Measure the Architectural Shell
Sketch the room freehand first, then measure. Record each of these:
- Wall lengths. Measure each wall at the floor, at 36 inches, and near the ceiling. Old rooms are rarely square. Use the smallest number.
- Door and window positions. Record the width, the distance from the nearest corner, and the sill height. Note which way each door swings and how far.
- Ceiling height. Check for soffits, beams, and sloped sections.
- Fixed elements. Mark outlets, switches, vents, radiators, and the thermostat.
- Wall thickness. Interior walls are usually 4.5 inches (2×4 framing with drywall) or 6.5 inches (2×6).
Measure twice. A one-inch error on paper becomes a 12-inch problem at full scale.
Step 2: Draft to Scale (The 1/4-Inch Rule)
Use the standard architectural scale of 1/4 inch = 1 foot. On graph paper with four squares per inch, each square equals one foot. A 14×16 room then measures 3.5 by 4 inches on the page and fits easily on a letter sheet.
For finer work, use 1/2 inch = 1 foot. Each square then equals six inches.
Draw the walls as double lines, about 1/8 inch apart, which equals 6 inches. Mark the doors with their swing arcs. A 32-inch door draws an arc of about 2.7 squares. Add the windows, vents, and outlets.
Then cut paper templates for the furniture at the same scale:
| Item | Real size | 1/4-inch scale (squares) | On paper |
|---|---|---|---|
| Queen bed | 60 x 80 in | 5 x 6.7 | 1.25 x 1.67 in |
| King bed | 76 x 80 in | 6.3 x 6.7 | 1.58 x 1.67 in |
| Nightstand | 24 x 18 in | 2 x 1.5 | 0.5 x 0.38 in |
| Dresser | 60 x 20 in | 5 x 1.7 | 1.25 x 0.42 in |
| Lounge chair | 32 x 34 in | 2.7 x 2.8 | 0.67 x 0.7 in |
Templates let you move furniture without erasing. Lay tracing paper over the base plan to test ideas.
Step 3: Establish Sightlines and Acoustic Buffers
Sightlines are what you see from a given point. Check two: from the doorway, and from the bed.
Stand in the doorway on your plan. The first thing you see should be calm, such as the headboard wall, a window, or a piece of art. It should not be the foot of the bed, a toilet, or a pile of laundry. Then sit on the bed. You should see a window or a quiet wall, not the door handle or the bath.
Next, plan for sound. Noise travels through shared walls, doors, and vents.
- Place the headboard on an interior wall that backs onto a closet or another bedroom, not a living room, kitchen, or bathroom.
- Use closets as buffers. A wall of hanging clothes absorbs sound.
- Choose solid-core doors (1 3/4 inches thick) for the bedroom and bath. Hollow-core doors pass sound almost freely.
- Add a door sweep or seal to close the gap at the bottom.
Step 4: Place Anchor Furniture and Verify Walkways
Start with the bed. It is the largest piece, and everything else relates to it. Then add the dresser, seating, and any desk.
On the plan, draw clearance lines with a colored pencil:
- 36 inches for primary walkways (door to bed, door to closet)
- 30 inches on each side of the bed that people use
- 36 to 42 inches in front of a dresser
- 24 inches only as a last resort
If any line collides with a template, move something. When the plan holds, mark it on the floor with painter’s tape. Walk it with the door open.
3. 4 Functional Bedroom Floor Plan Archetypes

These four plans cover most primary bedrooms. Use each as a starting point, then adjust for your own doors and windows.
Plan 1: The Classic Rectangular Primary Bedroom (12×14 Feet)
Room: 144 x 168 inches. Bed: king or queen.
Center the headboard on a 12-foot wall. A king (76 inches) leaves 34 inches on each side. A queen leaves 42. Both meet the 30-inch rule.
The bed takes 80 inches of the 168-inch length, so 88 inches remain at the foot. Use them well:
- Place a 24-inch-deep reach-in closet, 8 feet wide, on the foot wall. That leaves 64 inches.
- Set a 20-inch-deep dresser against a side wall in the foot zone. A walkway of more than 36 inches remains in front of it.
- Put the door in a long wall, near the foot, so entry never crosses the bed.
This plan is the baseline. Every other plan modifies it.
Plan 2: The Primary Suite with En-Suite and Walk-In Closet (14×18 Feet)
Room: 168 x 216 inches, plus a service wing. Bed: king.
Place the headboard on a 14-foot wall. The king leaves 46 inches on each side, a generous aisle. The long 11-foot foot zone holds a bench and a clear 48-inch path.
Attach the walk-in closet and bath along one of the 18-foot walls, outside the 14×18 rectangle. A closet of 6 by 8 feet fits double-sided hanging, with 2 feet for each rod and a 2-foot aisle. An 8-by-10-foot bath holds a double vanity, a shower, and a toilet compartment.
Order matters:
- Put the closet between the bed and the bath. Clothing absorbs sound.
- Use pocket doors on both rooms, so no swing arc eats wall space.
- Offset the bath door from the bed’s line of sight, so the toilet is never visible from the pillow.
Build the dresser into the closet. The bedroom wall stays open for art or a window.
Plan 3: The Square Bedroom with Corner Windows (12×12 Feet)
Room: 144 x 144 inches. Bed: king or queen.
Square rooms lack a natural long axis, so the windows set the plan. Say corner windows sit at the northeast corner, one on each wall.
Place the headboard on the west wall, opposite the windows. Light now falls across the bed from the side and in front, not into your eyes. Keep the headboard at least 12 inches from any window edge. The bed leaves 64 inches at the foot (144 minus 80). A 20-inch-deep bench or chest still leaves a 44-inch aisle.
Put the door on the south wall, close to the foot corner. Keep any dresser out of its 32-inch arc. A low dresser, 30 inches tall, can sit under a window sill that starts at 36 inches or more.
This plan assumes the closet lives in an adjoining space. If it does not, add a wardrobe on the foot wall and shrink the bench.
Plan 4: The Multi-Zone Suite with a Lounge Area (16×20 Feet)
Room: 192 x 240 inches. Bed: king or California king.
Split the 20-foot length into two zones. Give sleeping the first 12 feet and lounging the last 8.
- Sleeping zone. Headboard on a 16-foot wall. A king leaves 58 inches per side. The foot zone is 64 inches, enough for a 20-inch bench and a 44-inch path.
- Lounge zone. Two lounge chairs (about 32 x 34 inches) face a 28-inch round table, at least 36 inches apart. Place a window or fireplace on the far wall. An 8×10 rug anchors the group.
- Divider. Float a console 14 to 16 inches deep and 30 inches tall behind the chairs. It marks the edge of the zone without a wall.
Keep a 48-inch path from the door to both zones. Large rooms feel intentional when the paths are wide and the furniture floats.
4. Common Bedroom Floor Plan Mistakes to Avoid
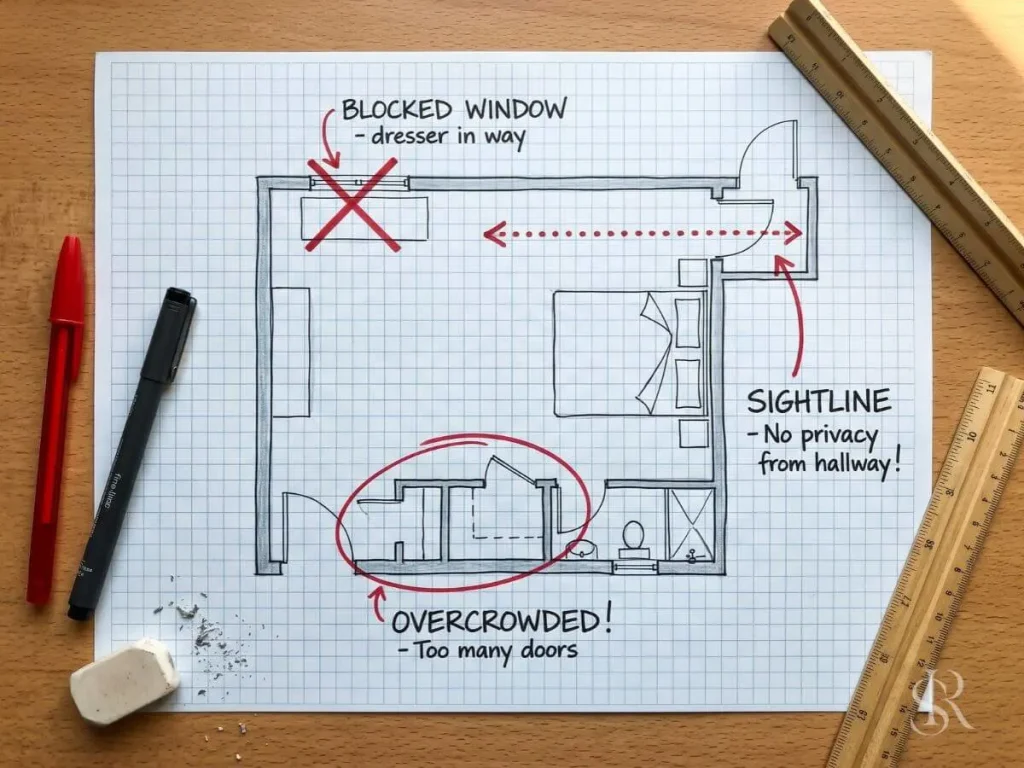
Three errors cause most of the regret in finished rooms. Check your plan for each.
Too Many Doors Breaking Up Solid Walls
Every door removes a wall. A hall door, a bath door, and a closet door can strip a room of its best headboard wall.
A king bed with a 24-inch nightstand on each side needs about 124 inches, or 10 feet 4 inches, of unbroken wall. A queen needs about 108 inches, or 9 feet. If no wall offers that, change the doors.
- Replace swing doors with pocket or barn doors.
- Combine the bath and closet entries into one passage.
- Widen the headboard wall by moving the door to a corner.
Blocking Natural Light and Airflow
A tall wardrobe in front of a window wastes the room’s best feature. So does a headboard that cuts a window in half.
Keep these clear:
- Egress. Bedroom windows must provide an opening of at least 5.7 square feet (5 on the ground floor), at least 24 inches high and 20 inches wide, with a sill no higher than 44 inches. Confirm local code.
- Operable windows. Keep one reachable on each side of the room for cross-ventilation.
- Vents and radiators. Keep furniture at least 6 inches from registers, and 12 inches from radiators.
Ignoring Sightlines from the Hallway
The view from the hall is the room’s first impression. A bed seen end-on from the door, or an open bath door beside it, makes the room feel exposed.
Test it. Stand in the hallway at the doorway of your plan. If you see the foot of the bed or a toilet, shift the door, add a short wall, or turn the bed. A console, a screen, or a closet bank can block the view without closing the room.
Frequently Asked Questions

What are standard bedroom dimensions in the US?
Guest and secondary bedrooms run 10×10 to 11×12 feet. Standard primary bedrooms run 12×14 to 14×16 feet. Luxury primary suites start at 16×20 feet. The model residential code sets a floor of 70 square feet for most habitable rooms and a 7-foot minimum width.
What size room do I need for a king bed?
A 12×12 room is the practical minimum for a king. It leaves 34 inches on each side and 64 inches at the foot. A 12×14 room is more comfortable, and a 14×16 room allows for a bench and a reading chair.
How do I design a bedroom floor plan on my own?
Measure the room and mark the doors, windows, and vents. Draw the room at 1/4 inch = 1 foot on graph paper. Cut paper furniture templates at the same scale. Place the bed first, then check the 30-inch bedside and 36-inch walkway lines. Tape the plan on the floor before you buy.
What is the best master bedroom floor plan?
The best one puts the bed on the longest solid wall, keeps the door away from the headboard, and gives each walkway at least 36 inches. Plan 1 above works for most 12×14 rooms. If you have space, Plan 2 adds a closet and bath as an acoustic buffer.
Conclusion: Blueprints Built for Calm
A calm room begins on paper. When the walkways are wide, the sightlines are quiet, and the headboard wall stays whole, the furniture almost chooses itself.
Do the work in this order: measure, draft at 1/4 inch to the foot, test the sightlines, place the bed, then everything else. Check each plan against the clearance numbers in this guide.
This weekend, measure one wall and sketch the room. Thirty minutes with graph paper will show you what the room can hold, and what it cannot.




2 Comments
Comments are closed.